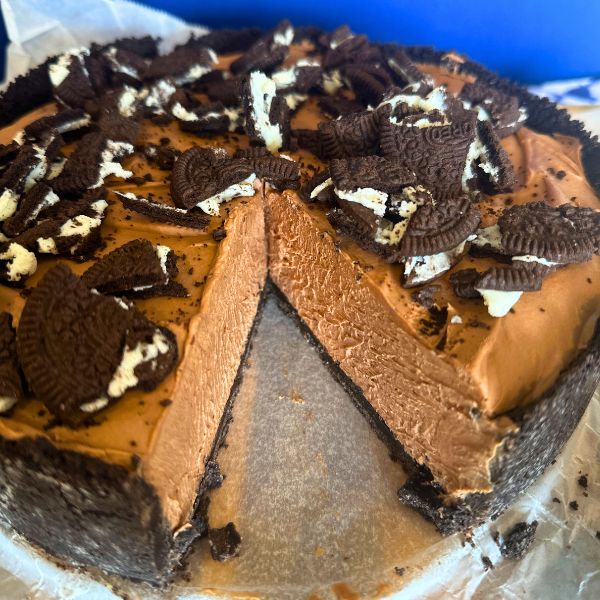
Oreo Cheesecake: The Ultimate No-Bake Delight!
Are you ready to dive into the world of decadent desserts with an Oreo cheesecake that will blow your taste buds away? This no-bake recipe is packed with the rich, creamy goodness of cheesecake, paired with a crunchy Oreo crust and indulgent dark chocolate. Best of all, it's super easy to whip up and doesn't require an oven! If you're looking to impress your guests or satisfy your chocolate cravings, this is the perfect recipe. Let’s explore how to create this divine Oreo cheesecake and share a few tips to make it even more amazing!

Why You'll Love This Oreo Cheesecake
This Oreo cheesecake is the perfect combination of two dessert legends – cheesecake and Oreos! The contrast between the velvety, smooth cheesecake filling and the crunchy Oreo crust makes every bite irresistible. Plus, it’s a no-bake cheesecake, so it’s fuss-free and perfect for those warmer months when you don’t want to turn on the oven.
Since this cheesecake uses simple ingredients like cream cheese, dark chocolate, and, of course, Oreos, it’s accessible and affordable. You don’t need to be a professional chef to pull this off either. Just a few easy steps, and you’ll have a show-stopping dessert that everyone will rave about!
The Secret to the Perfect Oreo Cheesecake
Here’s where the magic happens – the ingredients! For the best results, use full-fat cream cheese. Trust me, this isn’t the time to skimp on calories. Full-fat cream cheese gives the cheesecake its rich, creamy texture and tangy flavor. Make sure you’re using block cream cheese and not the spreadable type that comes in a tub. The spreadable version has extra moisture, which could leave your cheesecake too soft.
As for the chocolate, go for a high-quality dark chocolate with at least 70% cocoa. The deep, intense flavor of dark chocolate balances out the sweetness of the cheesecake filling, creating that luxurious, chocolatey taste we’re after. If you’re not a fan of dark chocolate, you can substitute it with milk chocolate, but expect the cheesecake to be sweeter.
When it comes to the crust, the key is to grind the Oreo cookies into fine crumbs to create a sturdy base for the filling. And don’t forget the melted butter – it helps bind everything together and adds that delicious, buttery richness. You can add a pinch of salt to the crust mixture for a little contrast if you’re a fan of sweet-and-salty desserts.
How to Get the Perfect Texture
The texture of your cheesecake is everything. To ensure a perfectly smooth and creamy filling, make sure your cream cheese is at room temperature before you start. Cold cream cheese can leave lumps in your mixture, and nobody wants that! Give it a good 20-30 minutes out of the fridge before using it.
When folding the whipped cream into the chocolate-cream cheese mixture, do it gently to keep the filling light and fluffy. You don’t want to lose all that air you’ve whipped into the cream – it’s what gives the cheesecake its cloud-like texture.
Once assembled, the hardest part is waiting! Let the cheesecake chill in the fridge for at least 6 hours, but overnight is even better. This allows the cheesecake to set properly and makes it easier to slice.

Serving Suggestions
-
Extra Oreos: Crumble a few extra Oreos over the top for that perfect crunch and a little extra cookie goodness.
-
Chocolate Ganache: Drizzle some chocolate ganache over the top for an extra indulgent touch.
-
Whipped Cream: Serve each slice with a dollop of freshly whipped cream to complement the richness of the cheesecake.
-
Fresh Berries: Balance out the sweetness with some tart raspberries or strawberries for a pop of freshness and color.
For a fancy presentation, you could also add chocolate curls or even sprinkle a touch of sea salt on top for a gourmet finish.
Tips & Tricks for Success
- Chill your bowl and whisk: When whipping the cream, place your mixing bowl and whisk in the freezer for about 10-15 minutes. This helps the cream whip up faster and more effectively.
- Room temp ingredients are key: Make sure your cream cheese is at room temperature, and when melting the chocolate, don’t let it get too hot! Stir it frequently and let it cool slightly before adding it to the cream cheese mixture.
- Don’t rush the chill time: It might be tempting to cut into the cheesecake early, but letting it sit in the fridge overnight will give you that perfect slice without the filling oozing out.
Similar Recipes to Try 🍪🍫
If you loved this Oreo cheesecake, here are a few more irresistible treats to add to your dessert rotation:
Share Your Oreo Cheesecake Creations!
I’d love to see your Oreo cheesecake masterpieces! Snap a pic of your creation and share it with me on Instagram @steph_cooks_stuff. Can’t wait to see how it turned out! 🎉

Oreo Cheesecake
Ingredients
Equipment
Method
- First, prep your springform pan by lightly greasing the edges with cooking spray and lining the bottom with baking paper.
- Grind your Oreos into fine crumbs using a food processor. Pour the melted butter over the crumbs and stir to combine. Press the crumb mixture into the bottom and up the sides of your pan to form a crust. Pop it in the fridge to chill while you make the filling.
- In a microwave-safe bowl, combine the chocolate and 1/4 cup of cream. Microwave until the chocolate is melted, stirring occasionally. Set aside.
- In another bowl, whip 1 ½ cups of cream, icing sugar, and a splash of vanilla until thick and fluffy. Set aside.
- In a large mixing bowl, beat the cream cheese until smooth and creamy. Add the sugar and vanilla, and continue to beat until it’s all well-combined. Now, pour in the melted chocolate and mix until smooth.
- Carefully fold the whipped cream into the cream cheese mixture until it’s fully combined. Pour the cheesecake filling into your chilled Oreo crust and spread it out evenly.
- Refrigerate for at least 6 hours (overnight is even better!). And that’s it – you’ve got a luscious chocolate cheesecake that’s sure to impress!
Nutrition
Video
Tried this recipe?
Let us know how it was!Frequently Asked Questions
Absolutely! If you prefer a sweeter cheesecake, milk chocolate is a great substitute. Just be aware that it will make the overall taste sweeter, so you might want to reduce the sugar slightly in the filling.
This cheesecake will stay fresh in the fridge for up to 5 days. Just make sure to cover it well with cling wrap or store it in an airtight container to prevent it from drying out.
Yes! You can freeze this cheesecake for up to 2 months. To freeze, wrap the entire cheesecake or individual slices tightly in plastic wrap, then in aluminium foil. Thaw in the fridge overnight before serving.


Hi, I'm Steph!
I turned a lifelong passion for food into a career as a professional chef, stopping in the Masterchef kitchen along the way. My goal is to inspire everyone to learn to love cooking, using basic pantry ingredients and fresh local produce to create delicious dishes.